It’s 11:00 at night. You’ve just submitted your book. You’ve gone to sleep and then, suddenly, it’s 2:00 a.m. and you’re wide awake, “what’s wrong with the yearbook?”
Hundreds of pictures, hundreds of names, thousands of words. Is it all right? Is someone in the wrong class? Did I spell something wrong?
It’s a common fear and a common condition. The middle of the night sweats thinking that something you have put your heart and soul into for the past few months is flawed. And who will find that flaw?
So, let’s do all we can during the design and proofing phase to avoid this.
Here is a breakdown of some of the more common yearbook typos/errors that we’ve come across:
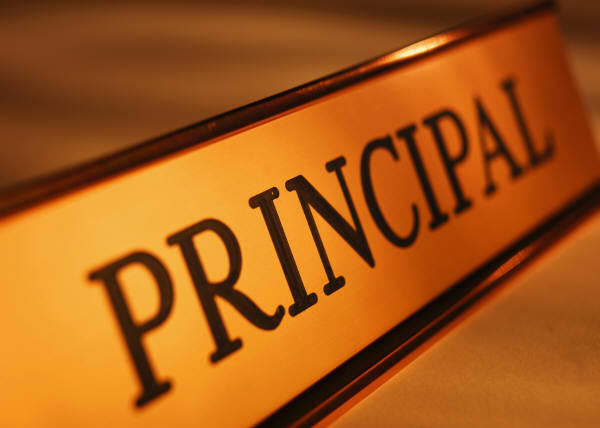
1. “The Principal is your pal.” We learned this in grade school. The correct spelling for the leader of your school is Principal, not Principle. Capitalized when it’s used as their title, lower case “p” when referring to the title, not the person. “Principal Smith is the principal of our school”.
Learn this. Memorize it. Teach it to your yearbook staff, students, and children. Trust me when I tell you that it will save you a huge embarrassment.
2. It / It’s / Its – “It” is a thing. This is really simple. Just remember that “it’s” is used to replace the words “it is”. It is a nice school can be written “It’s a nice school”. If you want to say “it has been a nice day”, then you don’t need the apostrophe “its been a nice day”. There are more advanced rules for this conjugation, but this will likely work for you most of the time.
3. They’re / There / Their – A common error. Just remember one little phrase: “They’re leaving their yearbooks over there.”
4. Apostrophe s / s apostrophe – Remember that an apostrophe indicates possession: “This is Principal Smith’s school”. If this was a school owned by Principal Davis (name ends in S) then it would be Principal Davis’ school or Principal Davis’s school. Either form is acceptable. Just please, oh please, make sure that you use it the same way consistently throughout the book: Mr. Jones’ Class, Mrs. Weeks’ Class or Mr. Jones’s Class, Mrs. Weeks’s Class.
5. I and Me. This is one of the most common grammatical errors. Remember to use “I” if you are the subject of the sentence: “I love school”. Use “me” when you are the object of the sentence: “This school loves me”. There’s a simple tool to help you remember it: break down the sentence.
Would you say “John and I are going to the bus?” or “John and me are going to the bus?” Which makes more sense: “I am going to the bus” or “Me is going to the bus”? Since I am the subject of the sentence, then “John and I are going to the bus.”
Of course, you should refer to a grammar website or book for more detailed explanations for the correct use of each of the above items, but these practical guidelines should help you avoid some of the most common flaws.
Good Afternoon!
Thank you for attending our YearbookLife Workshop. We always enjoy having the opportunity to meet with everyone in person and share and discuss ideas.
We know we covered a lot of information in a short amount of time. Please contact us if any of the information triggers any questions, concerns, or ideas.
Remember that the Help Menu within Pictavo provides excellent detailed instructions on all aspects of Pictavo with many video tutorials. The icon can be found in the upper right hand corner of any Pictavo page. Select the “+” sign to expand the lists.
The Help Center on our website has video tutorials that you can view as frequently as you’d like and share with other people on your committee. Click here to find access to those videos.
If you’d like to set up a Pictavo webinar for you or your group, please contact our trainer, Beth, at beth@yearbooklife.com. Beth has various day and evening times available and orchestrates all of our one-on-one presentations.
Finally, don’t forget our top-notch Pictavo Tech Support Team can be reached at 1-800-887-0414 with any and all Pictavo questions you may have.
Need extra supplies? Envelopes, sales flyers, banners, etc., can be shipped to you within a week. Please contact us for additional supplies and be sure to “Like” us on Facebook to receive tidbits of information throughout the season.
If you missed the workshop a video podcast will be available shortly on our website.
We look forward to a great year!
On Friday, October 17th 2014, we will be holding our annual “Yearbook Workshop.” We recommend new and long time yearbook advisers attend to get valuable tips to help make the yearbook process as stress free as possible.
The following topics will be discussed. We look forward to seeing you there.
YearbookLife Workshop Topics:
- Welcome and Introductions
- Sign Up Sheet
- Raffle
- Review Kits/Collection Envelopes
- Sales Flyers/Banners
- Receiving Our Emails
- Referral Fees
- Deposits
- Picture Resolution – 300 dpi
- Camera Settings
- Organizing Photos
- Scanning
- Supplements
- PSPA CD
- Deadlines
- Custom Cover
- What is a custom cover
- Proofs vs. No Proofs
- Corrections on Proofs
- Resubmissions
- Delivery
- Yearbook Enhancements
- Help and Support
- Tech Support
- WebEx
- Pictavo Help
- Customer Service
- Yearbook Kit
- Personal Visits
- Office Visits
- What’s New in Pictavo
- Pictavo BuyTheYearbook
- Money Distribution
- Pictavo is not a storage service
- Admins. and Multiple Admins
- Photo Upload Problems
- Submitting Your Book
- Questions
If you would like to learn more, please contact us toll-free at 888-680-0143.
BLEEDS
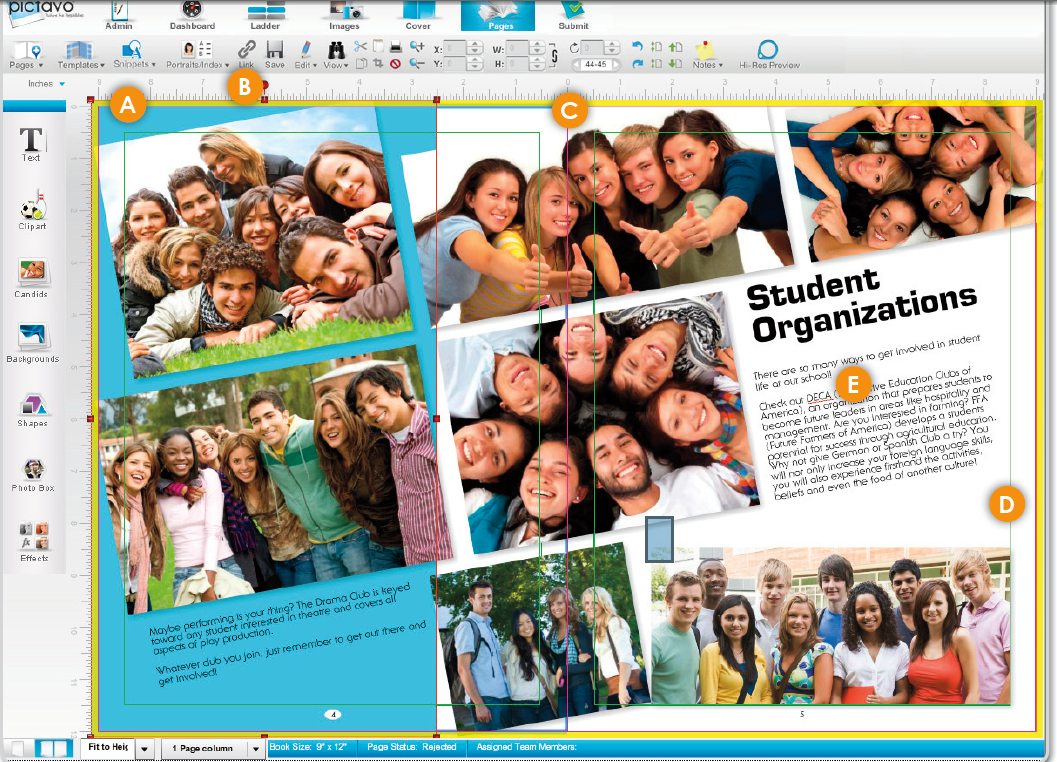
• The yellow border around the page in Pictavo is the bleed area. All color blocks and candids that are intended to extend off the page (or bleed) should completely extend to the outer edge of the yellow area. This will eliminate slivers of white at the edges of your pages when the page is trimmed.
• Pictavo backgrounds (and any custom backgrounds that you import into the Backgrounds folder) will automatically fill the bleed area completely.
(SEE A BELOW)
The candids and blue shape are properly extended to the outer edge of the yellow bleed area. There will be no white area on the page edges, because the image is set to bleed correctly.
TWO-PAGE SPREADS
• With a hard cover binding and two-page spreads, Smyth binding is recommended instead of a Standard Hard Cover binding. Standard Hard Cover bound books may lose up to 1/2” of the images and text that are placed across the gutter.
• Click on the Link tool (B) to link two pages together if you are designing two-page spreads in your book. Two-page spreads allow you to place images and/or text across the center, or gutter, of your book.
(SEE C BELOW)
This image crosses over the gutter of the book. If a Standard Hard Cover binding is used, portions of the students’ faces will be pulled into the binding and will not be visible to the reader.
SAFETY MARGINS
• The thin green margin lines around the edges of each page are safety margins. They are set 3/8” inside the trim edge. Keep important images and text inside these guides to prevent them from being trimmed off or lost in the gutter/binding.
• For items that are meant to extend off the page, it’s acceptable to place them outside the safety margins (see Bleeds above).
• If you are doing a hard cover book and have text or images that are less than 1/4” from the trim line on the spine side of the book, Smyth binding is recommended to prevent them from being lost in the binding.
(SEE D BELOW)
The image in the lower right is kept within the safety margins and there is no risk of it being
trimmed off.
Spell Check
• A red jagged line will automatically appear beneath any word not in the Pictavo dictionary.
• Right-click on the flagged word and a list of suggested alternatives will appear. You can also add the flagged word to the Pictavo dictionary if it is indeed correct.
See Spell Check in the Example shown (SEE E BELOW)
Images are the MOST important part of your yearbook project. The following information will help you get the best results from your images, and publish a spectacular-looking yearbook!
Be sure to consider the following when choosing images to include in your yearbook:
IMAGE COLOR SPACE
No need to alter your image color space. If images are RGB, no CMYK conversion is needed. Our PDF output settings and refining process will convert them to the proper color space. Most cameras and scanners include a source profile [also known as input profile] when saved. We recommend you embed [or tag] the source profile to each image. A source profile will define how the camera/scanner interprets the colors in the photo and make your color conversion clean and effortless.
How will my images look once they have been converted to CMYK?
Your converted images will look very similar to your original RGB files. There is much more color information in the RGB color space than can be printed with a CMYK profile, but the results have been very accurate with the conversion profiles we use. If you are concerned about how your images will convert, color testing is an option, if requested in advance.
IMAGE RESOLUTION
Resolution is a very important factor to consider when looking at your digital images. Resolution is defined in two ways: pixels per inch (ppi) on your screen and dots per inch (dpi) on a press. To print an image effectively, it needs to have a resolution of between 250 and 300 ppi/ dpi. The image should be the same dimensions that you plan to print it in your yearbook at a resolution of 300 dpi.
How can I change an image’s resolution?
Many people try to increase resolution (ppi/dpi) using imaging software such as Photoshop®; this usually makes the image quality worse. There is only a fixed amount of information (pixels) in an image, and by increasing the resolution and leaving the image size the same, you are asking the software to add more pixels to the image. The software is forced to “guess” what each added pixel should look like based on the other pixels around it, and the image becomes blocky or fuzzy.
If an image didn’t start out with a high resolution (250-300 dpi), the only way to increase the resolution is to retake the picture at a higher camera setting or rescan the image at 300 dpi. This does not apply to digital camera images that have been taken at a high-quality setting. They will have a low resolution (72 dpi), but the image dimensions will be large
enough to compensate for the resolution. The images actually have the extra pixels needed to increase the resolution when the photo dimensions are decreased.
DIGITAL IMAGES
Many digital cameras will have a resolution of 72 dpi, but the dimensions of the image are larger than you need – when you reduce the photo size, the resolution increases to 250 to
300 dpi. You may leave digital images the size they come off your camera and resize them in your layout program.
FILE FORMATS
JPEG (.jpg), TIFF (.tif), PNG (.png) and EPS (.eps) are all acceptable file formats to use in your yearbook. You choose the format when you save your images in the scanning or image editing software. JPEG files should be saved at a high quality setting (less compression 10–12) and are favored because of their small size. TIFF files must be saved with no compression. All images should have a unique name, 8 characters or less (excluding extension) if your book is being submitting using the
Non-PDF Plan.
IMAGE SCANS
For scanned pictures, the scan resolution must be set to at least 300 dpi for a scan at 100%. If you will enlarge a photo, increase the resolution of the scan to compensate. Notice the other scanner options before you scan your images.
WEB IMAGES
Images from the Web will have a low resolution of 72 dpi and will print poorly. We do not recommend their use. In addition, most images found on the Internet are copyright protected.
CONCERNS?
If you have concerns about your images, contact us at 1-888-680-0143 to discuss possible solutions and/or perform image testing.
We cannot be responsible for the quality (resolution or color) of your digital yearbook images once they have been submitted as PDF files.